Sunday, March 28, 2010

Puppy Love

WARNING...I'm about to digress from my usual home/garden/reno postings to enter the dog zone...

Those of you familiar with this blog will have noticed the photo of the puppy titled "Our little Juno", on the right side of this page.

Well she's all grown-up now (15 months), but here's a look back:


Planting a garden...in my head


Well, I'm still dreaming of spring (which is helped by the fact that the sun is out and it has warmed-up from last week). Today I planted some lily bulbs which will hopefully make an appearance in June or July.

I also took a retrospective journey through my digital photos of plants from my last garden:


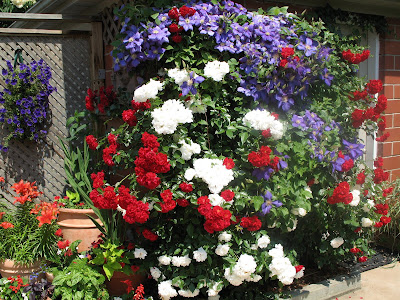
The hot Toronto summers and the well cultivated soil (I added compost every year) were the secrets to my success.

I also put in a little pond about ten years ago which we enjoyed every summer...


Thursday, March 18, 2010

Dreaming of Spring

Well, the weather here has turned cold and winter-like (just when we thought Spring was here). I'm longing to tackle my garden.

We bought our house just about two years ago. The first summer was consumed with the move itself (across the country), having the floors re-done and painting almost every room in the house. Last summer we were into full-on renovations of the kitchen, back porch and basement. We also had a new puppy. In short, the garden has been neglected since we moved in.

So, 2010 is the year of the front garden and enhancing curb appeal. The back yard will have to wait since we plan to build a new (detached garage), erect a new fence on one side of the property and build a deck or patio.

As you can see from the photos, our front yard is a very small (city lot) space but I have visions of a London or Paris style front garden. I envision boxwood (but I'm not sure how well it will grow in Calgary), a little fountain, lillies, climatis and roses.

We also need to address more practical matters like the peeling paint on the front concrete steps, beautifying or covering the concrete foundation beneath the siding, replacing the lattice with ballisters and figuring out new decking for the porch.

Here are some before photos (the first photo is from before the house was painted) and some inspiration shots.

BEFORE: (Note that we have added shutters to the upstairs windows since these photos were taken)


AFTER (?):


Any and all advice is welcome!

Wednesday, March 17, 2010

Getting Down to Business

One of the to-dos on our reno check-list was improving the look and functionality of our home office. A relatively small space (9 X 7 ft), it does feature a large window overlooking the backyard, an exterior door to the backyard, a sloped ceiling, and a door to the kithen.

When we bought the house, it was used as a TV room for their kids and was painted a bold (and dark) maroon colour (looks orange in the photos), with views to their bright yellow kitchen (see photos below).

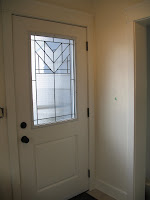
As part of our kitchen renovation last year we purposely bought enough tile for both the kitchen and the office. We also purchased extra overhead cabinets (to match the kitchen), replaced the lighting fixture and the back door. We also beefed-up the door trim and the base boards. All this helps to keep the continuity between the kitchen and office and also means that the space could also be used as a breakfast nook. Since there's just the two of us (plus our dog and budgie!), we prefer to use the space as an office/pet zone (I love having the computer close to the kitchen/on the main floor of the house).

About two weeks ago, hubbie tiled and grouted the office floor (matching it perfectly with the kitchen floor, which was tiled about six months ago), re-touched the paint (we had painted the room a warm creamy colour as soon as we moved in), and installed the baseboards. Upper cabinets have been hung, but doors and trim are yet to go on and final adjustments made, and window coverings are yet to be determined. Until then, here's a sneak peek and some before and after shots...


Sunday, March 14, 2010

Desperately Seeking Storage

If there's a disadvantage to developing your basement it's that the previously abundant storage space (in the form of an unfinished basement) disappears.

The upside of course, is the inevitable purge of "stuff" that occurs when reality hits home that you no longer have the room to store the "stuff" that's been hanging around for far too long. And, there's the potential to organize all the "stuff" we need to keep.

So, as part of our basement design plans, we installed a row of cabinetry at the foot of the stairs, in the hall leading to the bathroom. Here, we'll store winter coats, boots and shoes (welcome to Canada!), suitcases, Christmas decorations, etc.

We bought the cabinets at IKEA, and I thought I was being smart in just buying the frames and waiting for their annual sale to buy the doors (the frames were required to finish off the space and create much-needed storage). Well, not so smart it seems -- you see it turns out that the ONLY doors that fit the 100 cm PAX cabinet are sliding doors and wouldn't you know, that was the middle cabinet in our row of closets. The sliding doors were not an option (as they were about 1" to tall for our ceiling height), so, we now have a cabinet frame, cut/modified to fit under the heating duct, without a door.

Fortunately, my contractor brother-in-law has the tools and know-how to fabricate a door to match. He's already fabricated the doors on the opposite side of the hall (to hide the storage space under the stairs). Only one of them is painted in the photo and none are attached yet.

If there's a silver lining to this story, it's that since the door is now being custom made, we'll be able to make it wide enough to hide the space between the cupboards (which was designed holds mops and brooms). If there's a lesson, it's make no assumptions!

Basement Bathroom - complete!


Well, I promised to post the after shots of our basement bathroom.

Unfortunately, the installation of the frameless glass shower was completed in two sessions(with a two week delay in between) becuase one of the glass panels was warped and not discovered until the initial installation. Who knew that glass could wamp? I gather that the high temperatures involved in tempering the glass can cause warping. Anyway, it was worth the wait. We're thrilled with the result. The finished product is spacious and bright and is being well utilized!

We didn't install heated floors in the bathroom, but we did install a heated towel rack which we can always take with us if we move. I purchased it on-line from Home Depot.

Please ignore the green painters tape beside the vanity. We still have a few finishing touches including hanging a knob/ring for a hand towel by the sink, hanging the mirror above the sink, some paint touch-ups (hence the painters tape), and some sort of window covering.

PS: In case you're wondering, the inset medicine cabinet is actually above the toilet (not the sink) as the framing/plumbing above the sink prevented us from installing it there (it would have been off centre above the sink). I don't mind though because the light bounces from the window off both mirrors and helps keep the basement bathroom bright.

Let there be light


I can't believe it's been two months since I last posted a message on my blog. How time flies.

In my defence, we've had a lot going on -- finishing off the basement bathroom and basement media room, the kitchen and the office. But before I get to that, since it's a beautiful bright sunny day and because I'm overdue in responding to Terri's recent post on Windlost, I thought I'd cover the topic of lighting.

http://windlost.blogspot.com/2010/01/new-blue-room-in-progress-help-wanted.html

She was considering the purchase of a Hudson Valley Fixture which we purchased last summer and installed in our front hall (albeit in a different finish/colour). We love the way it casts beautiful shadows on the walls. Imagine my surprise when a follow-up post from her about lighting included the chandelier we installed in our dressing room last year!

We have actually replaced all of the lighting in the house --- unfortunately any "vintage" pieces that may have existed at one time had been replaced with 1970s or 1980s brass fixtures in most cases.

Our dining room fixture was our most important/expensive decision. There was much debate about whether it was too big (it is large!). However, given the open feeling of our main floor and the high ceilings, I think it works. The five light option wasn't nearly as dramatic and it would actually have been more expensive than my on-sale nine-lighter.
Related Posts with Thumbnails